Drive Shaft / Joint

Removal
1. Remove the rear wheel.
2. Remove the final gear case assembly.
3. Remove the drive shaft.
- Read more about Drive Shaft / Joint
- Log in to post comments
Removal
1. Remove the rear wheel.
2. Remove the final gear case assembly.
3. Remove the drive shaft.
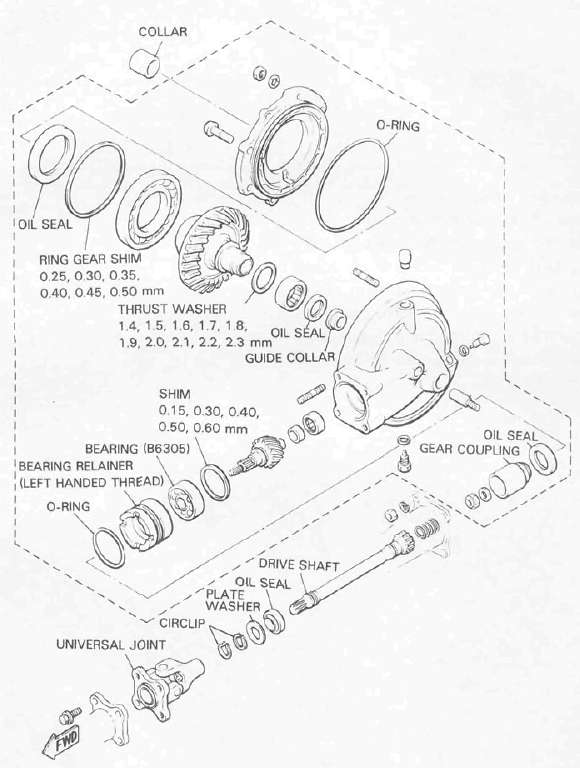
Final gear disassembly
1. Remove the nuts and bolts holding the bearing housing.
2. Remove the ring gear assembly and thrust washer from the final gear case.

3. Remove the self-locking nut from drive pinion by using the holding tool (special tool) and remove the coupling.
Final gear removal
1. Remove the rear axle and left shock absorber. Remove the rear wheel (see "REAR WHEEL" section in this chapter).
2. Remove the 4 nuts holding the final drive unit to the swing arm.
3. Remove the final gear assembly.
The following special tools are not available but can be constructed for the final gear disassembly and assembly:
PRESS TOOL NO. 1

PRESS TOOL NO. 2

GEAR CASE HOLDING TOOL
Cable maintenance
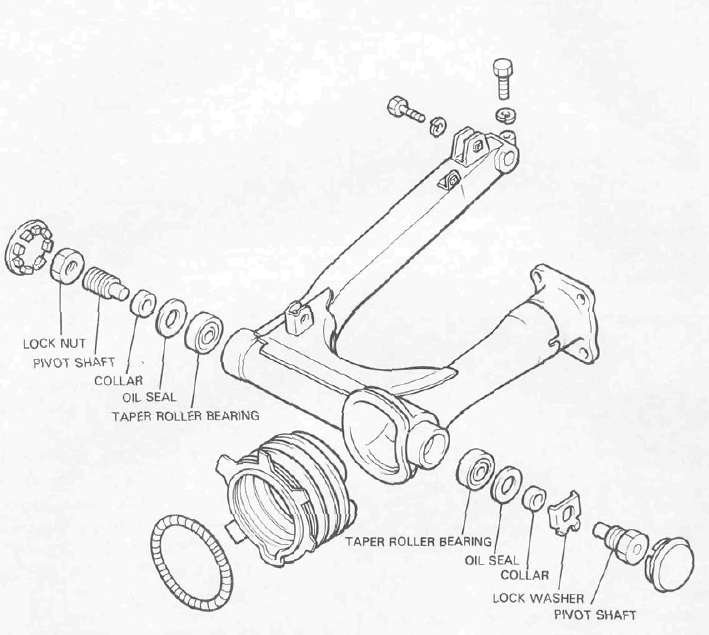
Inspection
1. Remove the rear wheel and both shock absorbers. Grasp the swing arm and try to move it from side to side as shown. There should be no noticeable side play.

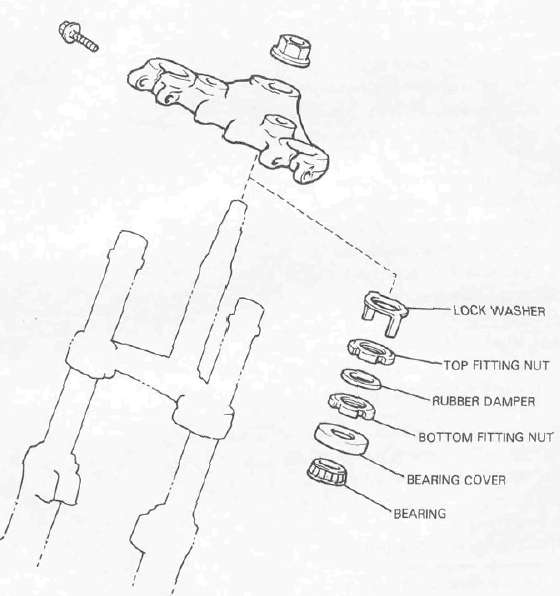
Adjustment
See Steering Head Bearings for Steering head adjustment.
Removal
1. Remove the front wheel, front forks, windscreen, handlebars and meter assembly.
System inspection
1. Apply the front brake for a few minutes and check to see if any brake fluid leaks out of the pipe joints, the master cylinder, or the actuating piston housing.
2. Check the fork for fork oil leakage.
3. Turn the anti-dive adjusting bolt to the maximum position.
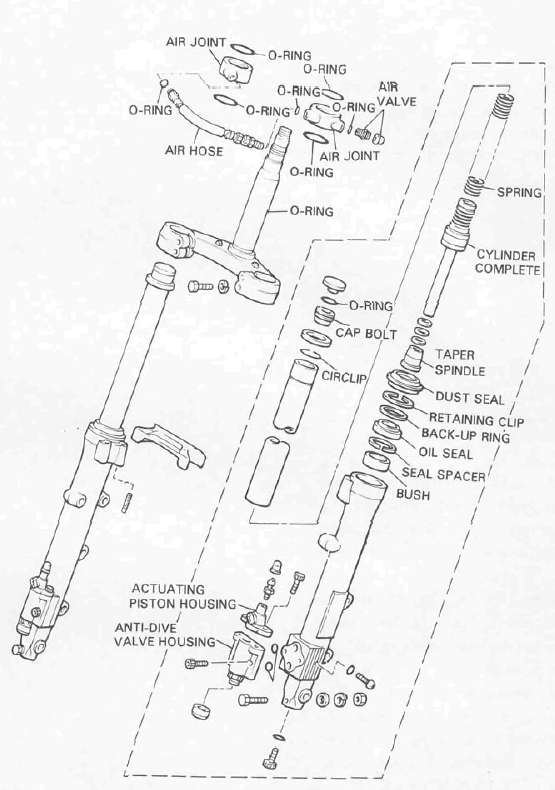
Removal and disassembly
WARNING: Securely support the motorcycle so it won't fall over when the front wheel and front forks are removed.
1. Remove the front wheel. Refer to "FRONT WHEEL"