Swing Arm, Rear Shocks, Cables and Fittings
Swing Arm, Rear Shocks, Cables and FittingsSWING ARM
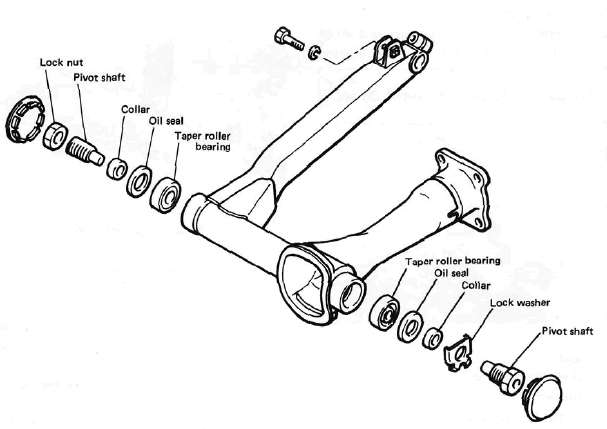
A. Inspection
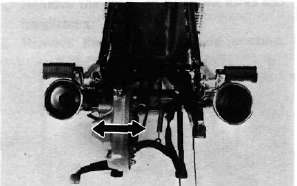
1. Free play inspection
Remove the rear wheel and both shock absorbers. Grasp the swing arm and try to move it from side to side as shown. There should be no noticeable side play.
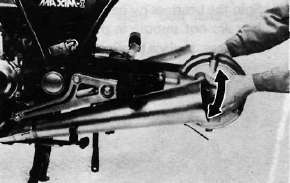
2. The swing arm is mounted on tapered bearings. Move the swing arm up and down as shown. The swing arm should move smoothly, without tightness, binding or rough spots that could indicate damaged bearings.
B. Adjustment
1. Remove the pivot shaft cap from the right side of the swing arm.
2. Loosen the right pivot shaft lock nut and tighten the pivot shaft (clockwise) to 0.5-0.6m-kg(43~52in-lb).
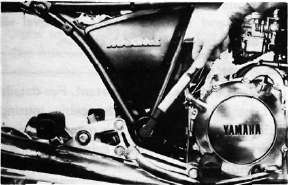
3. Tighten the pivot shaft lock nut.
NOTE:
Do not allow the pivot shaft to turn while tightening the lock nut.
Pivot shaft lock nut torque: 10m-kg (72.3ft-lb)
C. Removal
1. Remove the middle gear flange holding bolts.
2. Remove the rear wheel and shock absorbers.
3. Remove the final gear assembly.
4. Install the drive shaft puller attachment (special tool) on the side hammer bolt (special tool). Insert the 2 arms of the puller into the mouth of drive shaft housing. Tighten the 2 arms around the toothed flange of the drive shaft out of the universal joint. Pull out the drive shaft from the housing.
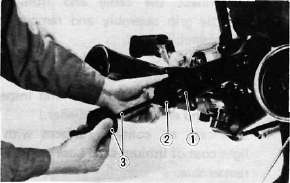
1. Drive shaft 2. Drive shaft puller 3. Slide hammer
5. Remove the swing arm pivot caps, the pivot shafts and the swing arm.
D. Inspection and Lubrication
1. Remove the oil seals and the bearings. Inspect the bearings for pitting or other damage. Make sure that the bearings roll freely. If a bearing is damaged, both bearings and both sets of inner and outer bearing races should be replaced.
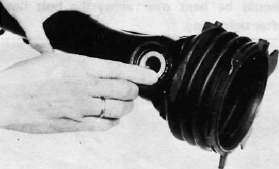
CAUTION:
Do not use compressed air to spin the bearings dry. This causes damage to the bearing surfaces.
NOTE:
When installing new bearings, grease liberally with lithium base, waterproof wheel bearing grease.
2. Always replace the grease seals when bearings are removed.
3. Examine the rubber boot for damage. Replace if damaged.
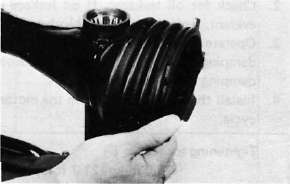
E. Installation
Installation of the swing arm can be accomplished by reversing the removal procedure. Observe adjustment procedures for obtaining equal frame/swing arm spacing.
Tightening torque: Left side pivot shaft: 10 m-kg (72.3 ft-lb) Right side pivot lock nut:
10 m-kg (72.3 ft-lb)
CAUTION:
A lock washer for left side pivot bolt must be replaced with a new one and the tab should be bent over along the bolt flat after tightening.
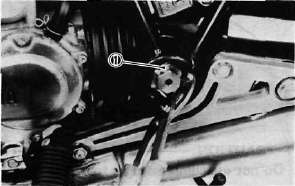
1. Lock washer
REAR SHOCK ABSORBER
A. Removal
1. Remove one (1) rear shock absorber at a time, inspect and reinstall before removing the other.
B. Inspection
1. Check the rod. If it is bent or damaged, replace the shock absorber.
2. Check for oil leakage. If oil leakage is evident, replace the shock absorber.
3. Operate shock absorber rod to check damping. There should be no noticeable damping as the shock extends.
4. Install the shock absorber on the motorcycle.
Tightening torque:
3.0 m-kg (21.7 ft-lb)
CABLE AND FITTINGS A. Cable Maintenance
NOTE:
See Maintenance and Lubrication intervals charts. Cable maintenance is primarily concerned with preventing deterioration through rust and weathering and providing proper lubrication to allow the cable to move freely
within its housing. Cable removal is straight forward and uncomplicated. Removal will not be discussed within this section.
WARNING:
Cable routing is very important. For details of cable routing, see the cable routing diagrams at the end of this manual. Improperly routed or adjusted cables may make the motorcycle unsafe for operation.
1. Remove the cable.
2. Check for free movement of cable within its housing. If movement is obstruced, check for fraying or kinking of the cable strands. If damage is evident, replace the cable assembly.
3. To lubricate the cable, hold it in a vertical position. Apply lubricant to the uppermost end of cable. Leave it in the vertical position until lubricant appears at the bottom. Allow any excess to drain and reinstall the cable.
NOTE:
Choice of lubricant depends upon conditions and preferences. However, a semi-drying chain and cable lubricant will perform adequately under most conditions.
B. Throttle Maintenance
1. Remove the Phillips head screws from throttle housing assembly and separate the two halves of housing.
2. Disconnect the cable end from the throttle grip assembly and remove the grip assembly.
3. Wash all parts in a mild solvent and check all contact surfaces for burrs or other damage. (Also clean and inspect right-hand end of the handlebar.)
4. Lubricate all contact surfaces with a light coat of lithium soap base grease and reassemble.
NOTE:
Tighten the housing screws evenly to maintain an even gap between the two halves.
5. Check for smooth throttle operation and quick spring return when released and make certain that the housing does not rotate on the handlebar.