FRONT BRAKE
Brake Fluid Inspection
1. Check the Brake fluid level. Replenish as required.
NOTE:
Use only DOT 3 or equivalent fluid from a sealed container.
WARNING:
Be sure that:
•Water does not enter the master cylinder when refilling.
•Spilled fluid is cleaned up immediately to prevent painted surfaces or plastic parts from eroding.
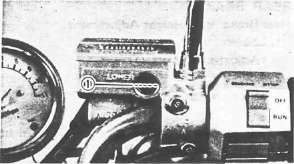
(1) Lower level
Front Brake Lever Free Play Adjustment
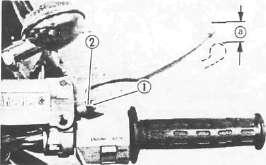
1. Loosen the adjuster locknut (1)
2. Adjust the free play (a) by turning the adjuster (2) until the free play (a) is within the specified limits.
Brake Lever Free Play (a): 2- 5 mm (0.08- 0.20 in)
CAUTION:
Proper lever free play is essential to avoid excessive brake drag.
3. Tighten the adjuster locknut
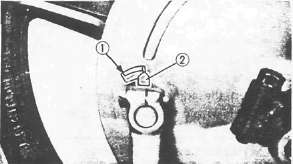
Brake Pad Inspection
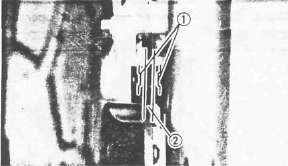
1. Activate the brake lever.
2. Inspect the wear indicator (1). If the indicator almost contacts disc (2), replace pads. Refer to "CHASSIS."
REAR BRAKE
Rear Brake Pedal Height Adjustment
1. Loosen the adjuster locknuts (1)
2. Adjust the brake pedal height (a) by turning the adjuster (2) until the brake pedal position is at the specified height.
Brake Pedal Height (a): 10 mm (0.4 in) Below the Top of the Footrest
WARNING:
Adjust pedal height, then adjust brake pedal free play.
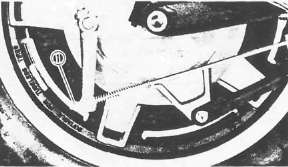
(1) Wear limit line
Rear Brake Shoe Inspection
1. Depress brake pedal.
2. Inspect the wear indicator (2). if the indicator is at wear limit line (1), replace brake shoes.
Rear Brake Pedal Free Play Adjustment
1. Rotate the adjuster nut (1). Turn it clockwise or counterclockwise until proper brake pedal free play is attained.
Brake Pedal Free Play: 20-30 mm (0.8-1.2 in)
WARNING:
Check to verify correct brake light operation after adjustment.
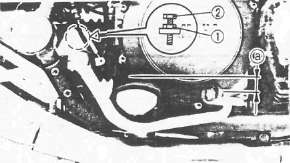
Brake Light Switch Adjustment
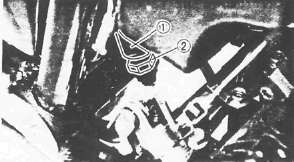
1. Hold the switch body (1) with your hand so that it does not rotate and turn the adjusting nut (2) .
- Printer-friendly version
- Log in to post comments