Final gear removal
1. Remove the rear axle and left shock absorber. Remove the rear wheel (see "REAR WHEEL" section in this chapter).
2. Remove the 4 nuts holding the final drive unit to the swing arm.
3. Remove the final gear assembly.
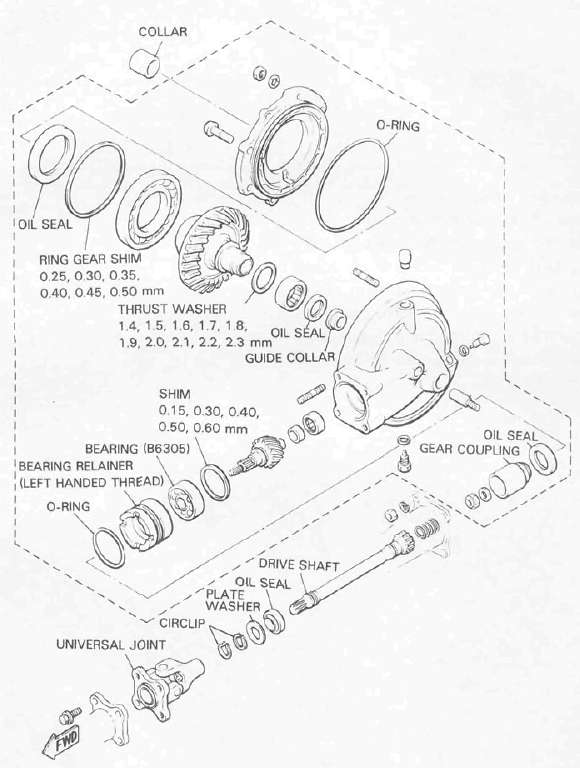
4. Remove the circlips, plate washer and oil seal. Then pull out the drive shaft.
1. Circlip 2. Plate washer 3. Oil seal 4. Drive shaft
Gear lash check and adjustment
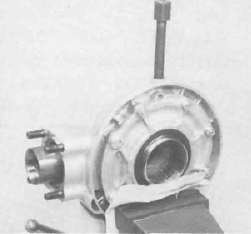
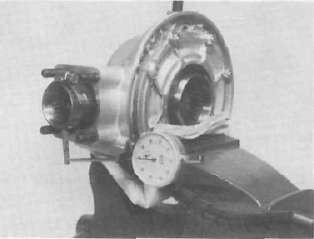
1. Secure the gear case in a vice or other support.
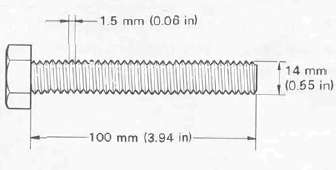
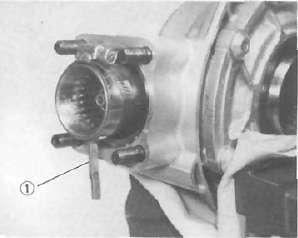
2. Remove the drain plug from the final gear case. Then, install a specified size of bolt (as shown) into the drain plug hole. Finger-tighten the bolt until it holds the ring gear.
NOTE: The bolt should not be over tightened, finger tight is sufficient.
3. Install the final gear lash measurement tool on the gear coupling.
1. Gear lash measurement tool (Final gear)
4. Mount a dial gauge against the lash measurement tool at the scribed mark (60 mm (2.36 in) from the center of the shaft).
5. Use the special wrench to gently rotate the gear coupling back and forth. Note the lash measurement on the dial gauge.
Final gear lash: 0.25 — 0.50 mm (0.010 — 0.020 in) When using the measurement tool. 0.1 — 0.2 mm (0.004 — 0.008 in) Actual gear lash on the final gear teeth
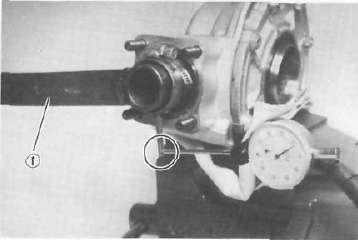
1. Middle and final gear noising tool
6. If the gear lash exceeds the specified limits, adjust as follows.
a. To reduce gear lash, increase the ring gear shim.
b. To increase gear lash, reduce ring gear shim.
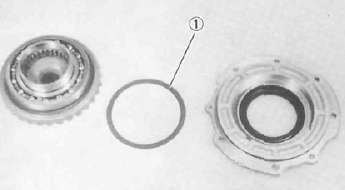
1. Ring gear shlim
c. If it is necessary to increase the ring gear shim by more than 0.1 mm (0.004 in) reduce the thrust washer thickness by 0.1 mm (0.004 in) for each 0.1 mm (0.004 in) of ring gear shim increase and if it is necessary to reduce shim by more than 0.1 mm (0.004 in), reverse above procedure.
- Printer-friendly version
- Log in to post comments