Front fork oil change
WARNING.
1. Fork oil leakage can cause loss of stability and safe handling. Have any problem corrected before operating the motorcycle.
2. Securely support the motorcycle so there is no danger of it falling over.
Raise:
• Motorcycle front end
Remove:
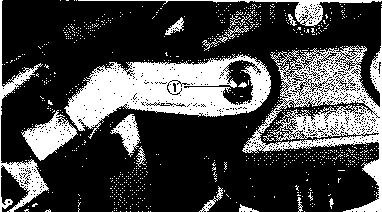
• Handle bar rubber cap
• Handle bar securing screw 1
• Handle bar
Remove:
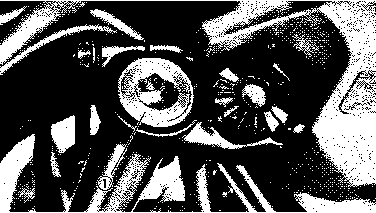
• Front fork rubber cap
• Cap bolt 1
Place:
• Receptacle under each drain hole,
Remove:
• Drain screw 1
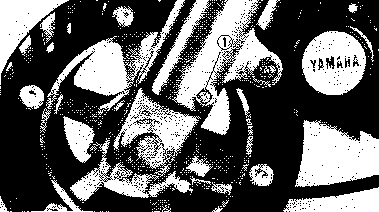
WARNING: Danger do not allow oil to contact disc brake components. Remove any oil found on these components to avoid diminished braking capacity.
After most of the oil has drained, slowly raise and lower outer tubes to pump out remaining oil.
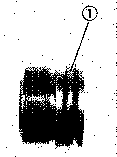
Inspect:
• Drain screw gasket. If damaged, replace it.
Install:
• Drain screw gasket
• Drain screw
Pour:
• Specified fork oil into Inner fork
SAE 10W30 Type SE Motor Oil: Oil Capacity (each fork):
286 ± 4cm3 (10.1± 0.14 Imp oz, 9.67±0.14USoz)
Slowly pump forks up and down to distribute the oil after filling.
Inspect:
• Cap bolt O-ring.1. Replace if damaged.
Install:
• Cap bolt
Cap bolt: 23 Nm (2.3m-kg, 17 ft-lb)
Install:
• Front fork rubber cap 1

Install:
• Handle bar
• Handle bar securing screw
Handle bar securing screw:
93 Nm (9.3 m.kg, 67 ft-lb)
Install:
• Handle bar rubber cap
Rear shock absorber adjustment:
The rear shock absorber of this model features a spring seat, which is a combined spring preload and damping adjuster. Normal adjustment can be made by turning this spring seat; whereas damping adjustment only can be made by the damping adjuster.
CAUTION: Before adjustment, make sure of the following:
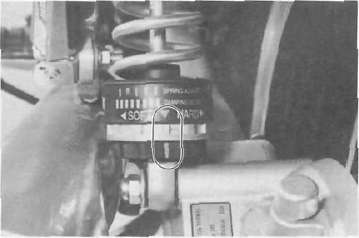
1. Turn in the damping adjuster fully. Then turn it back until its red painted slit aligns with the pointer "▼" on the spring cover.
2. For alignment in the absence of the red paint, turn the damping adjuster 6 clicks back from the fully turned-in position.
1. Spring seat adjustment
To increase the preload, turn the spring seat clockwise. To decrease the preload, turn the spring seat counterclockwise.
NOTE: When adjusting, use the special wrench which is included in the owner's tool kit
| Hard -------------------------------Soft | |
|
Mark |
|

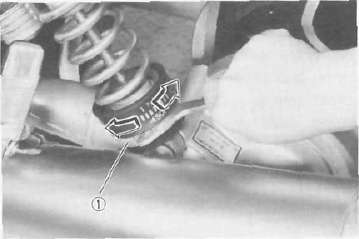
1. Spring seat
2. Damping adjustment
To increase the damping, turn the adjuster clockwise. To decrease the damping, turn the adjuster counterclockwise.
Standard position:
6 clicks turns out (or red mark) Minimum 12 clicks turns out Maximum 1 clicks turn out
NOTE: Make adjustment in less than one full turn of the adjuster.
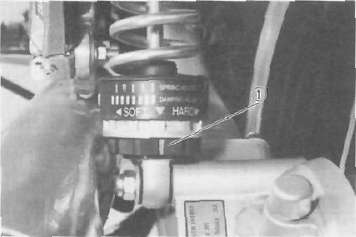
1. Damping adjuster
Recommended combinations of the front fork and the rear shock absorber settings.
Use this table as guidance to meet specific riding and motorcycle load conditions.
|
Rear shock absorber |
Loading condition |
|||||
|
Spring seat |
Damping adjuster turns out |
Solo rider |
With passenger |
With accessory equipment |
With accessory equipments and passenger |
|
|
1 |
|
6 |
O |
|||
|
2 |
|
4 |
0 |
|||
|
3 |
|
4 |
O |
|||
|
4 |
|
3 |
O |
|||


* Each numeral shows the damping value which can be set when the pointer is aligned with the individual slit in the spring seat. The damping adjuster may be further turned for a softer or a harder damping; in each of the above settings, it is recommended that the damping be adjusted by one (1) or two (2) clicks on the softer side and one (1) click on the harder side.
- Printer-friendly version
- Log in to post comments