Oil pump
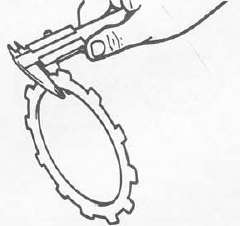
1. Check the clearance between housing and outer rotor.
Standard clearance: 0.03 — 0.09 mm (0.0012 — 0.0035 in)
2. Check the clearance between outer rotor and inner rotor.
Standard clearance: 0.03 — 0.08 mm (0.0012 — 0.0031 in)
3. Check the plunger for scratches and wear.
Clutch
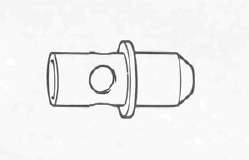
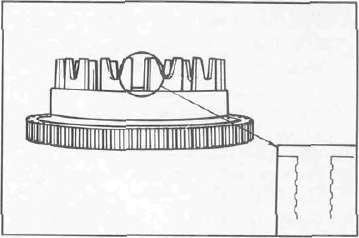
1. Clutch housing
a. Check the dogs on the clutch housing. Look for cracks and signs of galling on edges. If damage is moderate, deburr. If severe, replace the clutch housing.
NOTE: Galling on the friction plate dogs of the clutch housing will cause erratic clutch operation.
b. Check the clutch housing bearing for damage. If damaged replace bearing.
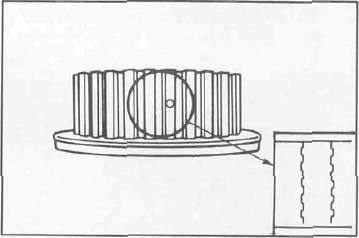
2. Clutch boss
a. The clutch boss contains a built-in damper beneath the first clutch plate (clutch plate 2). It is not normally necessary to remove the circlip and disassemble the built-in damper unless there is serious clutch chattering.
b. Check splines on clutch boss for galling. If damage is slight to moderate, deburr; if it is severe, replace clutch boss.
NOTE: Galling on clutch plate splines will cause erratic operation.
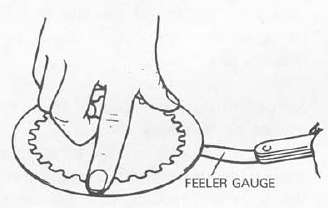
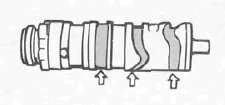
3. Friction and clutch plates
Check clutch steel plates and friction plates for heat damage. Measure friction plate thickness at 3 or 4 points. Check each clutch plate for signs of heat damage and warpage. Place on surface plate (plate glass is acceptable) and use feeler gauge as illustrated. If warpage exceeds tolerance, replace.
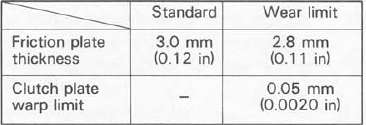
NOTE: For optimum performance, if any friction or clutch plate requires replacement it is advisable to replace the entire set.
4. Clutch actuating mechanism
a. Check the pull rod rack gear teeth for wear and damage, replace if damaged.
b. Check the pull rod thrust bearing for damage, replace if damaged.
c. Check the clutch lever shaft pinion gear teeth for damage, replace if damaged.
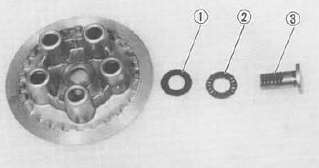
1 Plate washer 2. Thrust bearing 3. Pull rod
5. Clutch springs
Measure the clutch spring free length. Replace the springs as a set if any is less than minimum free length.
Clutch spring minimum length: 43.0 mm (1.69 in)
Transmission
1. Inspect each shift fork for signs of galling on gear contact surfaces. Check for bending. Make sure each fork slides freely on its guide bar.
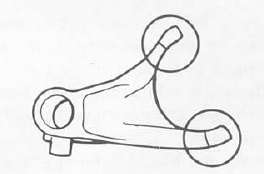
2. Roll the guide bar across a surface place. If the bar is bent, replace.
3. Check the shift cam grooves for signs of wear or damage. If any profile has excessive wear and/or damage, replace cam.
4. Check the cam followers on each shift fork for wear. Check the ends that ride in the grooves in the shift cam. If they are worn or damaged, replace the shift forks.

5. Check shift cam dowel pins and side plate for looseness, damage or wear. Replace as required.
6. Check the shift cam stopper plate and circlip and stopper for wear. Replace as required.
7. Check the transmission shafts using a centering device and dial gauge. If any shaft is bent beyond specified limit, replace shaft.
Maximum run-out: 0.08 mm (0.0031 in)
8. Carefully inspect each gear. Look for signs of obvious heat damage (blue discoloration). Check the gear teeth for signs of pitting, galling or other extreme wear. Replace as required.
9. Check to see that each gear moves freely on its shaft
10. Check to see that all washers and clips are properly installed and undamaged. Replace bent or loose clips and bent washers.
11. Check to see that each gear properly engages its counterpart on the shaft. Check the mating dogs for rounded edges, cracks, or missing portions. Replace as required.
Starter drives
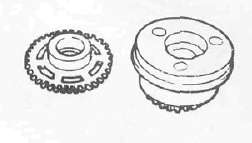
1. Electric starter clutch and gears
a. Check the surface of the idle gear for pitting or other damage. If severe, replace the gear.
b. Check the spring caps and the springs for deformation or damage. If severe, replace as necessary.
c. Check the starter clutch bolts (alien screw) for looseness. If loose, remove the bolts and replace with new bolts. Apply a thread locking compound such as "LOCTITE" to threads and tighten to specified torque. Stake over the end of the bolts.
Starter clutch bolt torque: 25 Nm (2.5 m-kg, 18 ft lb)
d. Check the "HY-VO" chain for damage and wear, replace if damaged.
e. Check the "HY-VO" chain guide for damage, replace if damaged.
Crankcases and strainer cover
I. Check crankcase for cracks or other
damage. I. Clean all oil passages and blow out with
compressed air.
3. Strainer cover: Apply a thread locking compound such as "LOCTITE" to strainer cover bolts during reassembly.
Bearing and oil seals
1. After cleaning and lubricating bearings, rotate inner race with a finger. If rough spots are felt, replace the bearing.
NOTE: Bearings are most easily removed or installed if the housings are first heated to approximately 95° - 125°C (200° - 250°F). Bring the case up to proper temperature slowly. Use an oven to avoid distortion.
2. Check oil seal lips for damage and wear. Replace as required.
- Printer-friendly version
- Log in to post comments