Inspection and Repair
- Read more about Inspection and Repair
- Log in to post comments
INSPECTION

1. Inspect the starter plunger 1 for damage. Replace if damaged or worn.
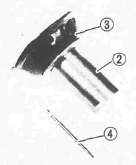
• Vacuum piston 2. Replace if scratched/worn.
•Throttle valve diaphragm 3. Replace if torn or damaged.
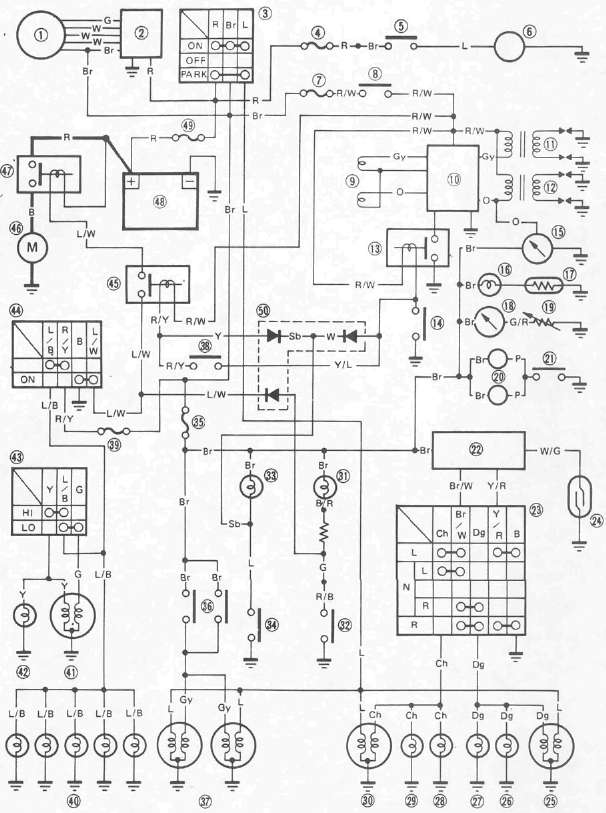
IGNITION SYSTEM
3 Main switch
7 Fuse "IGNITION" (10A)
8 "ENGINE STOP" switch
9 Pickup coil
10 T.C.I, unit
11 Ignition coil (#2, #3)
12 Ignition coil (#1, #4)
13 Sidestand relay
48 Battery
49 Fuse "MAIN" (30A)
SWINGARM AND REAR SHOCK ABSORBER
1 Rear shock absorber
2 Swingarm
3 Bearing
4 Oil seal
5 Collar
6 Lock washer
7 Left pivot shaft
8 Pivot cover
9 Right pivot shaft
10 Nut
11 Rubber boot
12 Spring band
PREPARATION FOR REMOVAL
1. Remove all dirt, mud, dust, and foreign material before removal and disassembly.
2. Use proper tools and cleaning equipment. Refer to CHAPTER 1, "SPECIAL TOOLS."
REMOVAL AND DISASSEMBLY
NOTE:
Be sure to drain the coolant before disassembly of the cooling system components.
1. Drain the engine oil
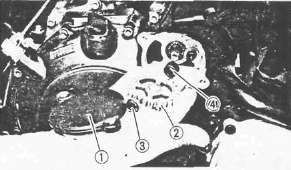
1. Refer to engine removal. Reverse those removal steps that apply.
2. Tighten engine mounting bolts
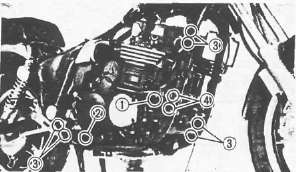
Engine Mounting Bolt: Front 1: 42 Nm (4.2 m-kg, 30 ft-lb)
Rear 2 : 90 Nm (9.0 m-kg, 65 ft-lb)
Down Tube 3 , Bracket 4 : 33 Nm (3.3 m-kg, 24 ft-lb)
|
Item |
Remarks | |||
SIGNAL SYSTEM